
Evaporator Coil Repair and Replacement in Salt Lake County
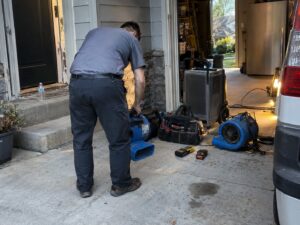
The evaporator coil is the indoor half of your split air conditioning system — the component inside the air handler or above the furnace where refrigerant absorbs heat from your home’s air. When the evaporator coil fails, the symptoms often look like an outdoor problem: weak cooling, the system running constantly, ice on the suction line, water leaking from the air handler. The actual failure is usually inside the indoor cabinet, hidden from view, on a component that requires careful access and proper refrigerant handling to diagnose or repair.
Most evaporator coil failures in the Salt Lake Valley fall into one of two categories: formicary corrosion (microscopic pinhole leaks throughout the coil, common on systems 6–10 years old) or freezing damage (ice formation that physically distorts coil fins and tubing). Less common but possible: punctures from screwdrivers or service tools during prior repairs, distributor tube fractures, and brazed-joint failures at the coil’s lineset connections. Each failure mode looks different, costs different amounts to address, and has different implications for whether to repair the coil or replace it.
Below is how we diagnose evaporator coil problems, what the common failure modes look like, what repair vs. replacement actually costs, and how to think about coil replacement when it intersects with a full system replacement decision.
How We Diagnose Evaporator Coil Problems
Coil diagnostics happen indoors, at the air handler. The full process:
- Symptom verification. What’s the system actually doing? Ice on the suction line, water leaking from the air handler, weak cooling, system running but not satisfying thermostat, condensate overflow on the secondary pan, or musty smell from the supply registers — each points toward different parts of the diagnostic.
- Initial refrigerant pressure readings. Suction pressure, discharge pressure, and superheat or subcool at the outdoor unit. Low suction pressure with high superheat usually means low charge; low suction pressure with high suction line temperature can mean restriction in the coil or metering device.
- Visual inspection of the coil through the access panel. Most air handlers have an access panel that allows visual inspection of the coil face. We look for ice formation patterns (uniform vs. localized — uniform ice usually means airflow restriction, localized ice means refrigerant distribution problem or partial coil leak), oily residue on coil surface (sign of refrigerant leak), debris accumulation, and biological growth.
- Static pressure measurement across the indoor blower. High static pressure usually means a ducted airflow restriction — dirty filter, restricted ductwork, undersized return air — that causes the coil to freeze even with proper refrigerant charge.
- Temperature differential across the coil. Supply air temperature minus return air temperature should be 18–22°F on a properly operating system. Higher differentials (over 25°F) indicate undercharge or low airflow. Lower differentials (under 15°F) indicate overcharge, oversized airflow, or coil leak.
- Coil pressure test if leak is suspected. When the visual inspection or operating measurements suggest a coil leak (slow charge loss, oily residue, weak cooling despite recent recharge), we can isolate the indoor coil section (closing the service valves at the outdoor unit), recover any remaining refrigerant, pressurize with dry nitrogen to 150–250 PSI, and observe pressure decay. A leaking coil drops pressure measurably over an hour; a sound coil holds pressure indefinitely.
- Electronic leak detection at suspected locations. If pressure test confirms a leak, electronic leak detection narrows down the specific location — distributor tubing, return bends, coil fin tubing, or brazed connections at the manifolds.
- Decision: repair, replace coil only, or replace system. Diagnostic results and system age dictate the recommendation. Documented findings shared with the customer in writing.
Common Evaporator Coil Failure Modes
Formicary Corrosion (Pinhole Leaks)
The most common evaporator coil failure mode we diagnose on systems 6–10 years old. Formicary corrosion gets its name from the ant-tunnel appearance of the corrosion pattern — microscopic networks of pinholes throughout the copper coil tubing, caused by reaction between copper and airborne contaminants (formaldehyde, sulfur compounds, certain cleaning chemicals, off-gassing from new construction materials).
- Symptoms: Slow loss of refrigerant charge over weeks or months. System initially works normally after recharge but loses cooling again within 1–6 weeks. Multiple recharges over a single season without finding an obvious leak point. Electronic leak detector picks up trace refrigerant throughout the air handler cabinet rather than at a specific point.
- Diagnostic confirmation: Pressure test the coil with nitrogen. A formicary-affected coil will drop pressure visibly within an hour. Sometimes pinholes are visible under close inspection as tiny oil-stained dots on the coil surface.
- Repair option: Generally not economical. Individual pinholes can theoretically be soldered shut, but more pinholes will develop in the same coil within months — formicary corrosion is a process, not a single failure. Soldering one pinhole today doesn’t address the underlying condition.
- Replacement: The only durable fix. New evaporator coil (matched to existing condenser) installed, with new lineset filter drier, system evacuated, weighed-in refrigerant charge, charge verification by superheat or subcool method.
- Typical cost: $1,200–$2,800 installed depending on coil access difficulty, refrigerant type, and matched-coil availability.
Freezing Damage
Repeated coil freezing can physically damage the coil — distorted fins, fractured tubing, broken solder joints from ice expansion. Once the coil sustains physical damage, refrigerant leaks at the damaged points typically follow.
- Symptoms: Visible ice on the suction line or visible through the coil access panel during operation. Water leaking from the air handler after ice melts. Eventually: system fails to maintain charge after the coil sustains leak damage.
- Root cause identification critical: Freezing is a symptom, not a cause. The actual cause might be low refrigerant charge (a leak somewhere else), insufficient airflow (dirty filter, restricted ducts, weak blower motor, undersized return air), or running the AC below its design temperature (trying to cool in 55°F weather). Coil replacement without addressing the root cause results in the new coil freezing too.
- Repair option: If the freezing was an isolated event and the coil has minor distortion only (no leaks confirmed), fixing the underlying cause (airflow, charge) and continuing to operate the existing coil is reasonable. If the coil has sustained leaks from ice damage, replacement is required.
- Typical cost: $1,200–$2,800 for replacement (same as formicary), plus the cost of addressing whatever caused the freezing in the first place ($0 for a dirty filter, $200–$500 for an airflow restriction fix, more if the root cause is upstream).
Distributor Tube Fracture
The refrigerant distributor at the coil’s inlet splits liquid refrigerant into multiple parallel feeder tubes, each feeding a section of the coil. The small-diameter feeder tubes are vulnerable to vibration fatigue over years of operation. Eventually one fractures, causing a small but persistent refrigerant leak.
- Symptoms: Gradual refrigerant loss similar to formicary, but localized to the distributor area. Sometimes audible “hissing” near the indoor unit when the system shuts off. Oil residue at the distributor.
- Diagnostic confirmation: Electronic leak detection at the distributor area pinpoints the location. Often visible upon close inspection.
- Repair option: A distributor tube fracture can sometimes be repaired by brazing if the fracture is accessible and the surrounding tubing is sound. However, repairs at this location are technically demanding and often fail again at the same or adjacent locations. We assess case by case.
- Typical cost: $500–$900 for repair if feasible; $1,200–$2,800 for coil replacement if repair isn’t economical.
Brazed Connection Failure at Coil Lineset
The connections where the refrigerant lineset attaches to the indoor coil (typically at the inlet header and outlet header) are factory-brazed joints. Original-install brazing defects, vibration over years of operation, or thermal cycling can cause these joints to crack or develop pinholes.
- Symptoms: Refrigerant loss localized to the coil header area. Visible oil residue at the connection points. Sometimes electronic leak detection picks up consistent readings at a specific connection.
- Repair option: Re-braze the failed joint. Requires refrigerant recovery, opening the system, cleaning the joint, brazing under nitrogen purge, leak testing, evacuation, recharge, and verification.
- Typical cost: $450–$900 depending on access difficulty.
Physical Damage from Prior Service
Occasionally we see evaporator coils damaged by previous service work — screwdrivers slipped during access, sheet metal screws driven into coil tubing during cabinet reassembly, or coil fins crushed during inspection. Damage from prior service is sometimes repairable, sometimes not, depending on extent and location.
- Symptoms: Visible puncture or crushed fins. Refrigerant leak typically begins shortly after the damaging service event.
- Repair option: Soldering a single puncture in accessible tubing is feasible; significant damage requires coil replacement.
- Typical cost: $300–$700 for minor solder repair; full coil replacement otherwise.
Evaporator Coil Replacement Process
When the diagnosis confirms coil replacement is the right call, the work runs through a consistent sequence:
- Source the correct matched coil. The replacement coil must be matched to the existing outdoor condenser by AHRI rating and refrigerant type. We verify the match before ordering — pulling a replacement coil that doesn’t AHRI-match the outdoor unit is one of the most common causes of poor system performance after a coil replacement done by less careful contractors.
- Schedule the install. Most coil replacements take 4–6 hours on-site. We schedule whole or half-day appointments to ensure adequate time without rushing.
- Recover remaining refrigerant. Any refrigerant remaining in the system is recovered per EPA Section 608 standards using a recovery machine and DOT-rated tank.
- Disconnect and remove old coil. Refrigerant lineset disconnected at coil headers, electrical disconnected, condensate drain disconnected, coil removed from the cabinet. Old coil documented and disposed of per disposal requirements.
- Inspect the air handler cabinet and surrounding components. While the coil is out, we check the cabinet for rust, the blower wheel for dirt accumulation, the condensate pan for cracks or biological growth, the float switch operation, and the return air filter rack condition. This is often the only time these are visible during the equipment’s life.
- Install new coil. New coil set in the cabinet, brazed to the refrigerant lineset using proper nitrogen purge to prevent oxide formation inside the lineset, condensate drain reconnected with proper pitch.
- Install new lineset filter drier. Mandatory anytime the refrigerant system is opened — filter drier absorbs any moisture or contaminants that entered during the open period.
- Pressure test with nitrogen. Pressurize to 150–250 PSI, observe for at least 15 minutes to verify no leaks at the new brazed joints. Document pressure and time.
- Evacuate to deep vacuum. Two-stage vacuum pump pulls the system to 500 microns. Verify the vacuum holds without rising for at least 10 minutes — confirms no leaks and no moisture remaining.
- Weigh in refrigerant charge. Charge by weight to manufacturer specification, adjusted for lineset length if different from factory standard.
- Verify charge by superheat or subcool method. Run the system, measure operating conditions, verify charge is correct. Document final superheat or subcool value.
- Operational test. Run system through full cooling cycle, measure temperature differential across coil (target 18–22°F), measure supply temperature at registers, verify thermostat staging.
- Document and email results to customer. All measurements, charge weight, brazing locations, and any other observations sent to customer for their records.
Repair vs. Replace: When to Replace the Whole System Instead
An evaporator coil failure on a system 8+ years old often triggers a conversation about whether to replace just the coil or replace the full system. The math:
| System Age | Likely Recommendation |
|---|---|
| Under 6 years | Replace coil only — system has substantial useful life remaining and warranty may cover the coil part |
| 6–10 years | Replace coil only in most cases. Existing condenser typically has 5–10 years of useful life remaining. Replacing the matched system would waste good equipment. |
| 10–12 years | Math gets nuanced. Coil replacement at $2,000 vs. full system replacement at $10,000 with rebates and tax credits considered. Often the right answer depends on the condenser’s condition and SEER2 efficiency upgrade potential. |
| 12–15 years on R-410A | Frequently the right time to replace the full system. Both the coil and the condenser are approaching typical end-of-life; replacing just the coil postpones the inevitable. |
| Over 15 years, R-22 systems | Almost always replace the full system. R-22 supply costs make coil-only replacement uneconomical, and the system is beyond typical useful life regardless. |
We model the numbers in writing for the borderline cases — coil-only repair cost vs. full system replacement cost net of rebates and tax credits, projected operating cost differences, expected remaining life — so the decision is based on actual math rather than a sales pitch in either direction.
Manufacturer Warranty on Evaporator Coils
Most major HVAC manufacturers warrant the evaporator coil for 10 years from installation when properly registered within 60–90 days of install. The warranty covers the coil part itself. Labor for warranty replacement is NOT typically covered unless an extended warranty was purchased at original installation.
If your system is within the warranty window and we confirm the coil failure is a manufacturer defect (most formicary corrosion failures qualify), we file the warranty claim with the manufacturer on your behalf, order the replacement coil under warranty, and complete the labor portion. You pay the labor and refrigerant cost (typically $800–$1,500) rather than the full replacement cost.
Evaporator Coil Replacement Cost
- Diagnostic visit with leak isolation: $99–$179 (applied toward repair if you authorize work)
- Nitrogen pressure test of suspected coil: $150–$250 if performed as a standalone diagnostic; included if combined with repair
- Single pinhole or distributor repair (rare cases where feasible): $500–$900
- Re-braze of coil header connection: $450–$900
- Warranty coil replacement (labor and refrigerant only, with manufacturer covering coil part): $800–$1,500
- Out-of-warranty coil replacement (coil, refrigerant, filter drier, labor): $1,200–$2,800 depending on access, refrigerant type, and matched-coil availability
- Full system replacement when coil failure triggers the decision: $5,500–$22,000 depending on equipment tier (see AC installation page)
Why Coil Replacement Costs What It Costs
An evaporator coil costs $400–$900 in parts. Customers sometimes ask why the installed price runs $1,200–$2,800. The answer involves the labor and materials required to do it right:
- Refrigerant recovery (EPA-required, time and equipment cost)
- System access — opening the air handler cabinet, sometimes requiring sheet metal work to access tight installations
- Brazing under nitrogen purge (proper technique requires specialized equipment and time)
- New filter drier ($30–$80 part)
- Pressure testing with nitrogen (requires nitrogen, regulator, time)
- Deep vacuum evacuation (requires vacuum pump and time — proper evacuation to 500 microns takes 30–60 minutes)
- Weighed-in refrigerant recharge ($200–$600 in refrigerant cost depending on type and quantity)
- Charge verification and operational testing
- Documentation and warranty registration
A “$800 evaporator coil replacement” advertised by some shops typically skips multiple of these steps — pumping refrigerant down rather than recovering it, skipping the nitrogen pressure test, evacuating to a less rigorous standard, charging by gauge pressure rather than weight, omitting the new filter drier. Each shortcut shows up months or years later as premature failure, inadequate cooling, or contamination problems in the new coil. We don’t take those shortcuts and price accordingly.
Frequently Asked Questions
- How do I know if my evaporator coil is leaking?
- Common symptoms: refrigerant charge keeps dropping despite no obvious outdoor leak, slow loss of cooling capacity over weeks or months, ice forming on the suction line, water leaking from the air handler, multiple recharges within a single season. Definitive diagnosis requires opening the system for nitrogen pressure test or electronic leak detection at the coil.
- How much does evaporator coil replacement cost?
- Out-of-warranty coil replacement typically runs $1,200–$2,800 in the Salt Lake market, including the coil, refrigerant recharge, new filter drier, brazing, evacuation, and labor. Under manufacturer warranty (most major brands warrant coils for 10 years when registered), the cost drops to $800–$1,500 (labor and refrigerant only).
- How long does evaporator coil replacement take?
- Most replacements take 4–6 hours on-site. The actual physical coil swap takes about an hour; the rest is refrigerant recovery, system access, brazing under nitrogen, pressure testing, evacuation (30–60 minutes for proper vacuum), recharge, and verification.
- What’s formicary corrosion?
- Microscopic pinhole leaks throughout the copper coil tubing, caused by chemical reaction between copper and airborne contaminants like formaldehyde, sulfur compounds, and certain cleaning chemicals. Named for the ant-tunnel appearance of the corrosion pattern. Common cause of coil failure on systems 6–10 years old. Not economically repairable — coil replacement is the only durable fix because more pinholes continue developing.
- Can I just keep recharging instead of replacing the coil?
- You can pay for that approach for a while, but the math doesn’t work and the side effects compound. Recharging a leaking coil costs $200–$600 per recharge and only buys 1–6 weeks of cooling. Over a single season you’ll spend more on recharges than the cost of coil replacement. Beyond cost, sustained low-refrigerant operation damages the compressor, repeatedly venting refrigerant to the atmosphere is illegal under EPA Section 608, and the underlying corrosion process continues unabated. Replacement is the right answer.
- Is the evaporator coil covered by my manufacturer warranty?
- Almost certainly yes if your system is under 10 years old and the warranty was registered within 60–90 days of installation. The coil part itself is typically covered for 10 years. Labor for replacement is NOT covered by standard warranties (typically $800–$1,500), but extended warranties purchased at installation often cover labor too. We file warranty claims on your behalf with the manufacturer.
- Should I replace just the coil or the whole system?
- Depends on system age and condition. Under 6 years, replace coil only — equipment is too new to discard. 6–10 years, usually replace coil only — condenser typically has many years left. 10–12 years, the math gets nuanced and we model both options in writing. Over 12 years, especially on R-22, full system replacement usually makes more sense than postponing the inevitable. Final decision is always yours; we show the numbers.
Schedule Evaporator Coil Diagnostic
If you suspect an evaporator coil leak — slow refrigerant loss, weak cooling, ice on the suction line, water at the air handler — call (385) 250-0687 for a diagnostic visit. We’ll measure, isolate the coil if needed for pressure testing, confirm the failure mode, and quote repair or replacement options in writing so you can decide with real numbers.
- Phone: (385) 250-0687
- Email: info@aegisheatingandair.xyz
- Address: 4454 Manhattan Ct, West Valley City, UT 84120