
Refrigerant Recharge and Leak Detection in Salt Lake County
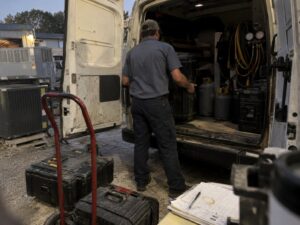
Refrigerant doesn’t get “used up.” If your air conditioning system is low on refrigerant, it’s because the refrigerant escaped somewhere — through a pinhole leak in a brazed joint, a degraded Schrader valve core, formicary corrosion in an evaporator coil, or a connection that was never tightened to manufacturer specification at the original install. Adding refrigerant to a leaking system without finding and repairing the leak first is the single most common form of HVAC malpractice we see. It’s also illegal under EPA Section 608 regulations, which require leak repair on systems above 50 pounds of refrigerant before recharge, and which prohibit knowingly venting refrigerant to the atmosphere — exactly what happens when you “top off” a leaking system.
We don’t do that. Every refrigerant recharge call starts with leak detection. If we find a leak, we repair it before we recharge. If we can’t find a leak, we tell you that and discuss next steps (dye injection, isolation testing, or whether the system was simply undercharged at the original install). Below is how we approach refrigerant work, what the major refrigerant types are, why leak repair matters more than recharge cost, and what to expect on a refrigerant service call.
Why Refrigerant Leaks Matter
Refrigerant loss isn’t a comfort issue. It’s a cascade:
- Reduced cooling capacity. An AC system 20% low on refrigerant delivers roughly 20% less cooling. The system runs longer, your electric bill climbs, and the house doesn’t hold temperature on hot days.
- Compressor damage. Low refrigerant changes the thermodynamic conditions inside the compressor. Refrigerant returns to the compressor warmer than designed, the compressor runs hotter, lubricating oil migrates out of the crankcase, and bearings start wearing prematurely. Sustained low-refrigerant operation is the single most common cause of compressor failures we diagnose on systems under 10 years old.
- Evaporator coil freezing. Low refrigerant pressure drops the evaporator coil temperature below freezing. Moisture in the air condenses and freezes on the coil. Ice blocks airflow. The system runs but doesn’t cool. When you shut the system off, the ice melts and dumps water into your air handler — sometimes overflowing the condensate pan and damaging ceilings below.
- Environmental harm. The refrigerants used in modern HVAC are potent greenhouse gases. R-410A has a global warming potential of 2,088 — meaning a pound of R-410A vented to the atmosphere contributes the same greenhouse effect as 2,088 pounds of CO2. The newer low-GWP refrigerants (R-454B at 466, R-32 at 675) are significantly better, but venting any refrigerant is both illegal under EPA Section 608 and environmentally meaningful.
- Real money. Refrigerant isn’t cheap. R-22 (used in pre-2010 systems) now costs $100–$200 per pound for recovered stock. R-410A runs $35–$75 per pound. R-454B and R-32 (used in newer 2024+ equipment) are in the $50–$90 range. A 3-ton AC system holds 6–10 pounds. Recharging a leaking system means paying for refrigerant that escapes again within months.
The math is simple: leak repair plus one recharge costs less than three repeated recharges over a year. And the environmental and equipment-damage costs of repeated recharges aren’t even captured in that math.
How We Detect Refrigerant Leaks
Leak detection on AC systems uses several complementary methods. We typically start with the cheapest and fastest, escalating to more involved methods only when needed.
Electronic Leak Detection
An electronic leak detector “sniffs” for trace amounts of refrigerant in the air near suspected leak points. Modern detectors can identify leaks as small as 0.1 ounce per year — well below the threshold where a system shows operational symptoms. Common detection points:
- All brazed joints on the outdoor unit (where service valves connect to the lineset, where the discharge line connects to the compressor)
- All flare connections at the service valves and at the indoor coil distributor
- The Schrader valve cores on suction and liquid service ports (a frequent leak point that’s easy to miss)
- The evaporator coil itself (particularly on systems 8+ years old where formicary corrosion is common)
- The condenser coil tubing (less common but possible after hail damage or coil cleaning damage)
- Lineset welds and connections (particularly if the lineset has been disturbed or relocated)
Electronic detection is fast and reliable for accessible leaks. It struggles when the leak is intermittent (opens only at certain pressures or temperatures), very small, or hidden inside an inaccessible cabinet.
Soap Bubble Test
Confirming a leak found by electronic detection. Applied to specific joints, soap bubbles form visibly at any leak point. Useful for verifying a specific connection before committing to repair, and useful at flare joints where electronic detection sometimes gives false positives from residual oil.
Dye Injection
For intermittent leaks that don’t show up reliably with electronic detection, we can inject UV-reactive dye into the refrigerant system. The dye circulates with the refrigerant and exits at any leak point, where it’s visible under UV light. Dye is useful for slow leaks or leaks that open only under thermal cycling. Drawback: requires the system to run for several days to a week before re-inspection, so it’s not a same-day diagnostic.
Pressure Testing with Nitrogen
For systems where the refrigerant has fully escaped or where leak isolation is needed, we can pull the remaining refrigerant out (recovered to EPA standards), evacuate the system, and pressurize with dry nitrogen to 150–300 PSI depending on the components. A nitrogen-pressurized system holds the pressure indefinitely if there are no leaks. Pressure drop over an hour indicates a leak; the rate of drop suggests the leak size. Nitrogen testing can also be used in isolated sections (closing the service valves to test just the lineset, or just the indoor coil, or just the outdoor unit) to narrow down the leak location.
Visual Inspection for Oil Staining
Refrigerant systems carry oil for compressor lubrication. When refrigerant leaks, oil leaks with it. Oily residue at connections, on the evaporator coil, on the lineset insulation, or pooling in the condenser cabinet usually marks the leak location even before electronic detection confirms it. This is often the first thing we look for during an initial assessment.
Common Leak Locations We See
Schrader Valve Cores
The service ports on the outdoor unit (used for connecting refrigerant gauges during installation and service) have small valve cores similar to a bicycle tire valve. These cores are made of rubber and metal and degrade over time, particularly when service caps are missing or damaged. A leaking Schrader core is one of the easiest leaks to find and one of the cheapest to fix — typically $50–$150 including the valve core and Schrader cap replacement.
Evaporator Coil Formicary Corrosion
The indoor evaporator coil is exposed to airborne contaminants — cleaning chemicals, formaldehyde from building materials, sulfur compounds, and others. Over 6–10 years, these contaminants can cause “formicary corrosion” (named for its ant-tunnel appearance), creating microscopic pinhole leaks throughout the coil. Once formicary corrosion starts, more pinholes will develop over time. Repair-by-soldering individual pinholes isn’t economical because new ones appear; the only durable fix is coil replacement.
Symptoms: slow loss of charge over months, leak detection finds general low-level refrigerant in the air handler cabinet without a specific point source, oily residue on the coil surface. Repair cost: evaporator coil replacement typically $1,200–$2,800 including labor and refrigerant.
Brazed Joints from Original Installation
Joints brazed during the original install can fail years later if the brazing wasn’t done correctly. Common issues: insufficient nitrogen purge during brazing (causing oxide formation that weakens the joint), wrong filler material for the metal combination, or pinhole defects in the braze itself. Repair: re-brazing the joint, which requires recovering remaining refrigerant, opening the system, cleaning the joint, re-brazing under nitrogen purge, evacuating, and recharging. Typically $400–$900 depending on accessibility.
Flare Connections
Refrigerant linesets connect to service valves and indoor coils through flared fittings. Flares depend on precise tightening to manufacturer torque specification — under-torqued flares leak; over-torqued flares can split. Most flare leaks trace to under-torqued connections at original installation. Fix: re-flare the connection (sometimes requires new lineset section if the original flare is damaged) and re-torque to spec. Cost: $200–$500.
Lineset Damage
The refrigerant lineset between the outdoor unit and the indoor air handler is exposed to physical damage, freeze-thaw cycling on uninsulated sections, and corrosion if buried or run through wet locations. Common failures: lineset crushed by lawn equipment or contractor work, lineset suction insulation degraded over years allowing condensation and corrosion, lineset connections at exterior walls degraded by sun exposure. Repair cost ranges widely depending on extent — anywhere from $300 for a short repair section to $1,500+ for full lineset replacement.
Outdoor Coil Damage
The outdoor condenser coil is exposed to weather, hail, debris, and physical impact. Coil fin damage doesn’t usually cause leaks, but punctures from hail, falling tree limbs, or contractor damage can. Repair: pinhole leaks in copper coils can sometimes be repaired by soldering; significant damage typically requires full coil replacement at $800–$2,000 depending on coil size.
Refrigerant Types and What’s in Your System
Different systems use different refrigerants based on the era they were manufactured. Refrigerant types are not interchangeable — putting R-454B in an R-410A system, or vice versa, damages the equipment. Knowing what’s in your system matters for both service and replacement decisions.
R-22 (Pre-2010 Systems)
- Status: Phased out of production since 2010. No new R-22 manufactured in the United States since 2020. Existing systems can be serviced using reclaimed/recovered R-22 only.
- Current cost: $100–$200+ per pound of recovered stock
- Repair economics: Refrigerant cost alone often makes R-22 system repairs uneconomical. A 5-pound recharge can run $500–$1,000 in refrigerant alone, not counting labor or leak repair. For systems older than 12–15 years on R-22, replacement is usually the better long-term answer.
- Identifying R-22: System nameplate. Most systems manufactured before 2010 use R-22. Equipment manufactured 2010–2014 may use either R-22 or R-410A. After 2014, R-22 in new equipment is rare.
R-410A (2010–2024 Systems)
- Status: Standard refrigerant for residential AC equipment from approximately 2010 through 2024. Still in production for service stock but new equipment manufacturing transitioned to R-454B and R-32 starting in 2024.
- Current cost: $35–$75 per pound
- Outlook: R-410A will be available for service for the next 10–15 years. Existing R-410A systems are economical to maintain through their useful life. New equipment manufactured for the U.S. market after 2024 uses lower-GWP alternatives.
R-454B and R-32 (2024+ Systems)
- Status: Standard refrigerants for new residential AC equipment manufactured starting in 2024 under EPA’s AIM Act phasedown of high-GWP refrigerants. R-454B is more common on Trane, Carrier, and Lennox new equipment; R-32 is more common on Daikin and Mitsubishi.
- Current cost: $50–$90 per pound (pricing still stabilizing as production scales up)
- Important note: Both R-454B and R-32 are mildly flammable (A2L classification), which requires updated service procedures, leak detection equipment, and safety training. We carry the appropriate detection equipment and our technicians are trained on A2L refrigerant handling.
Why You Can’t Mix Refrigerants
Each refrigerant requires specific compressor lubricating oils, specific lineset cleaning procedures, and specific operating pressure ranges. Mixing refrigerants — or putting R-454B into a system designed for R-410A — causes immediate problems: incorrect operating pressures, oil incompatibility leading to compressor failure, and (with A2L refrigerants in R-410A equipment) potential safety issues. We always verify the refrigerant type before service.
The Recharge Process
Once a leak has been found and repaired, the recharge itself follows a precise procedure:
- Recover remaining refrigerant. Any refrigerant left in the system is recovered to EPA Section 608 standards using a recovery machine and DOT-rated recovery tank.
- Replace filter drier. When a refrigerant system is opened (for leak repair or component replacement), the filter drier — which absorbs moisture and acid from the refrigerant — must be replaced. A new filter drier is installed on the liquid line.
- Evacuate system to deep vacuum. A two-stage vacuum pump pulls the system down to 500 microns (well below atmospheric pressure). The system holds the vacuum for at least 10 minutes to verify no leaks remain and no moisture is present.
- Weigh in refrigerant charge. Refrigerant is added by weight, not by pressure. The manufacturer’s nameplate specifies exact charge weight (e.g., “Factory Charge: 5 lb 8 oz R-410A”). For systems where lineset length differs from the factory-assumed length, the charge is adjusted accordingly (typically 0.6 oz per foot for liquid line over the standard 25-foot reference length).
- Verify charge with superheat or subcool. After charging, the actual operating refrigerant level is verified by measuring suction superheat (on fixed-orifice systems) or liquid subcooling (on TXV/EEV systems) at actual operating conditions of your home that day. Pressure readings alone are insufficient — superheat or subcool is the only reliable verification method.
- Operational test. System runs through a full cycle. Suction line temperature, discharge temperature, supply air temperature, return air temperature, and temperature differential across the evaporator coil are all measured and recorded.
- Documentation. Charge weight added, charge verification measurements, leak location and repair method, and Schrader cap status are recorded in your customer file.
Refrigerant Service Cost
- Diagnostic and leak detection visit: $99–$179 (applied toward repair if you authorize work)
- Schrader valve core replacement (most common leak fix): $200–$350 including leak detection, Schrader core, and refrigerant top-off
- Flare connection repair: $300–$550 including leak detection, re-flare, and recharge
- Brazed joint repair: $450–$900 including leak detection, brazing, evacuation, and recharge
- Evaporator coil replacement (typical for formicary corrosion): $1,200–$2,800 including coil, labor, refrigerant, and filter drier
- Lineset replacement: $600–$2,000+ depending on length, access, and complexity
- Outdoor coil replacement: $800–$2,000 depending on coil size
- Refrigerant top-off pricing (per pound, including labor): R-22 $150–$275/lb, R-410A $75–$135/lb, R-454B and R-32 $90–$160/lb
R-22 systems with major leaks are often best replaced rather than repaired given the high cost of R-22 and the limited remaining useful life of the equipment. We’ll run repair-vs-replace math for any R-22 system needing significant refrigerant work.
What We Don’t Do
- We don’t recharge leaking systems without finding the leak. Illegal under EPA Section 608 (for systems above 50 pounds), environmentally harmful, and bad for your equipment. Some cheap operations do this. We don’t.
- We don’t add refrigerant by pressure readings alone. Pressure readings change with outdoor temperature, indoor humidity, and load. The only reliable way to verify charge is by superheat or subcool method at actual operating conditions.
- We don’t condemn evaporator coils without verification. Sometimes what looks like a coil leak is actually a Schrader valve or a connection at the distributor. We verify the leak location before recommending expensive repairs.
- We don’t vent refrigerant. All refrigerant removed from a system is recovered to a DOT-rated tank for proper disposal or reclamation. EPA Section 608 requires it; environmental ethics demand it.
Frequently Asked Questions
- Why is my AC low on refrigerant?
- Refrigerant doesn’t get consumed — it operates in a closed-loop sealed system. If your system is low, refrigerant escaped through a leak. Common leak points include Schrader valve cores, evaporator coil pinholes (formicary corrosion), brazed joints, flare connections, and lineset damage. A proper diagnostic identifies the leak location before any recharge.
- How much does it cost to recharge AC refrigerant?
- Refrigerant top-off pricing varies by type: R-22 runs $150–$275 per pound including labor, R-410A runs $75–$135 per pound, R-454B and R-32 run $90–$160 per pound. A complete recharge after major repair is generally 5–10 pounds of refrigerant. However, we always identify and repair leaks before recharging — recharging without leak repair is illegal and wasteful.
- How often should AC refrigerant be replaced?
- Never, in a properly functioning system. Refrigerant operates in a sealed closed loop and is not consumed by normal operation. If a system needs refrigerant added, there’s a leak that should be located and repaired. The only exception is systems that have been opened for major service (compressor replacement, coil replacement, lineset modification), which require full recharge as part of the repair.
- Can I add refrigerant to my AC myself?
- No. Federal law (EPA Section 608) requires technicians who handle refrigerants to be EPA 608 certified. Self-service refrigerant kits sold at hardware stores are often illegal for the buyer to use without proper certification, frequently overcharge systems leading to compressor damage, and don’t address the underlying leak that caused the low charge. Self-recharge also voids most manufacturer warranties on the equipment.
- What’s the difference between R-410A and R-454B?
- R-410A has been the standard residential AC refrigerant since 2010. R-454B is a newer low-GWP alternative being phased in for new equipment starting in 2024 under EPA’s AIM Act. R-454B has roughly 78% lower global warming potential than R-410A but is mildly flammable (A2L classification) and requires updated handling procedures. The two refrigerants cannot be mixed — equipment designed for one cannot run on the other.
- Why can’t you just keep adding refrigerant if I’m okay with the cost?
- Three reasons. First, repeated venting of refrigerant to the atmosphere is illegal under EPA Section 608 for systems above 50 pounds, and is environmentally significant for any refrigerant. Second, sustained low-refrigerant operation damages the compressor — every recharge buys cooling for a few months while damage accumulates. Third, the math doesn’t work — leak repair plus one recharge almost always costs less than three repeated recharges over a year. We’re licensed by Utah DOPL and federally certified to handle refrigerants properly; doing it wrong puts that licensing at risk.
- My AC was just recharged 6 months ago and it’s low again. What do I do?
- You have a leak that wasn’t found or wasn’t repaired. Call us at (385) 250-0687 for a leak detection visit. If your previous contractor recharged without finding the leak, we can document that practice for any future warranty or legal discussion. The fix is finding and repairing the leak, then recharging — which is what should have happened the first time.
Schedule Refrigerant Service
If your AC is short on refrigerant — running constantly without cooling, ice on the suction line, or unable to hold temperature on hot days — call (385) 250-0687 for a leak detection visit. We’ll find the leak, quote the repair in writing, and complete the work with proper recharge and verification.
- Phone: (385) 250-0687
- Email: info@aegisheatingandair.xyz
- Address: 4454 Manhattan Ct, West Valley City, UT 84120